
Easter Holiday Fun

How to dye eggs naturally with the whole family
This Easter we are not permitted to gather with loved ones and friends but we can still enjoy the rituals around Easter. Chocolate galore, hot cross buns and virtual gatherings instead (now we can really appreciate Facetime or Skype or some of the other platforms that enable us to check-in on screen). So let’s make this Easter one to remember because it IS different.
Let’s celebrate the difference and make defining enjoyable moments to remember.
I have chosen to create lasting memories for my three boys; memories of an Easter in the midst of a vastly changing world. So today I honoured a long-held promise and we had so such fun. We spent memorable moments dyeing eggs. Planning it, getting messy AND having so much fun.
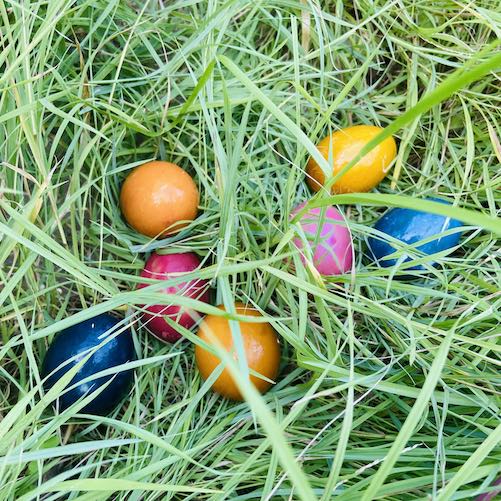
It began with deciding on the colours we wanted to use and how we would make these because were determined to use ONLY natural dyes – these are so much more interesting. A little research led us to checking out our vegies to see if we could find the right ones:
- Pink – beetroot
- Blue – purple cabbage
- Yellow – turmeric
- Orange – brown onion skins.
Now it was time to prep the dyes so here is the recipe for each:

Pink Dye Ingredients
2 cups of grated beetroot
2 cups of water
Apple cider vinegar
Method
- Add the beetroot and water to a saucepan and bring to the boil. Reduce to a simmer and leave for 30mins.
- After 30mins allow to cool and strain into a jar.
- Add 1 tablespoon of apple cider vinegar for every cup of liquid and allow to cool.
Blue Dye Ingredients
2 cups of chopped red cabbage
2 cups of water
Apple cider vinegar
Method
Repeat the process above but with cabbage.
Yellow Dye Ingredients
1 tablespoon turmeric
2 cups of water
Apple cider vinegar
Method
Repeat the process above but with turmeric.
Orange Dye Ingredients
2 cups of brown onion skins
2 cups of water
Apple cider vinegar
Method
Repeat the process above but onion skins
Dying your boiled eggs
- Place eggs into a saucepan and cover with water.
- Bring to a rapid boil then turn the stove off and leave the eggs sitting in the hot water for 10 mins.
- Rinse the eggs in cool water.
- When the eggs are cool to touch clean the eggs with a little soap to remove any oils on the shell that will resist the dye.
- Carefully dry your boiled eggs and gently place them in the dye and leave them in the fridge.
We left ours in the fridge overnight– the longer you leave them the darker the dye will be. They are ready to eat – Yum!
Tip: Dyed eggs do not take on the flavour of the dye. We made yummy boiled egg sushi with our eggs.
I hope we have inspired you to look outside the box and create some special memories on your life this Easter.
Happy creating Sue and Nikki